
Introducing Week Timer
Week Timer has been developed with your user experience in mind. Ideally you don’t want to do any timesheet management or week reporting, but your employer demands it.
Week Timer aims to be as streamlined as possible so you can log your working times effortlessly and complete your timesheet in an accurate manner. At the same time you can also track your overtime on a daily, weekly and monthly basis. Just tap the timer to toggle between the different views!
Using Week Timer
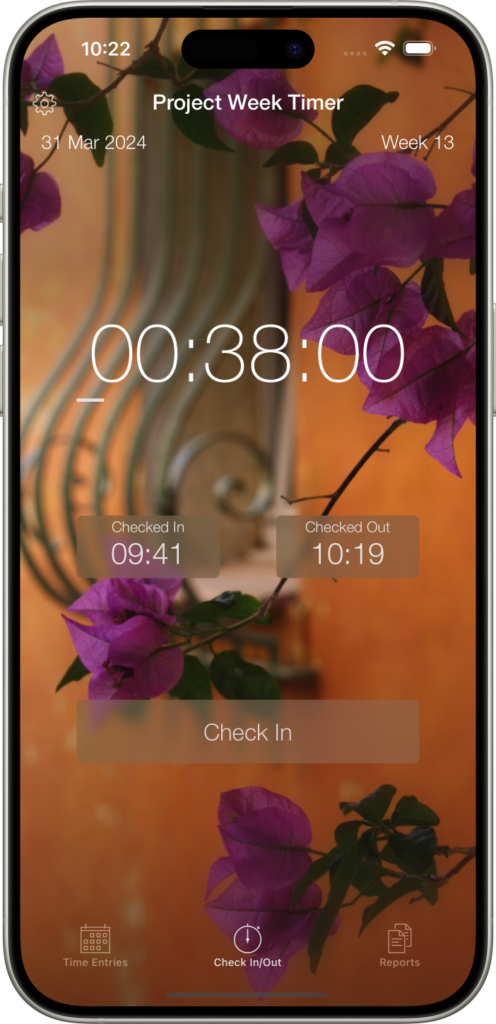
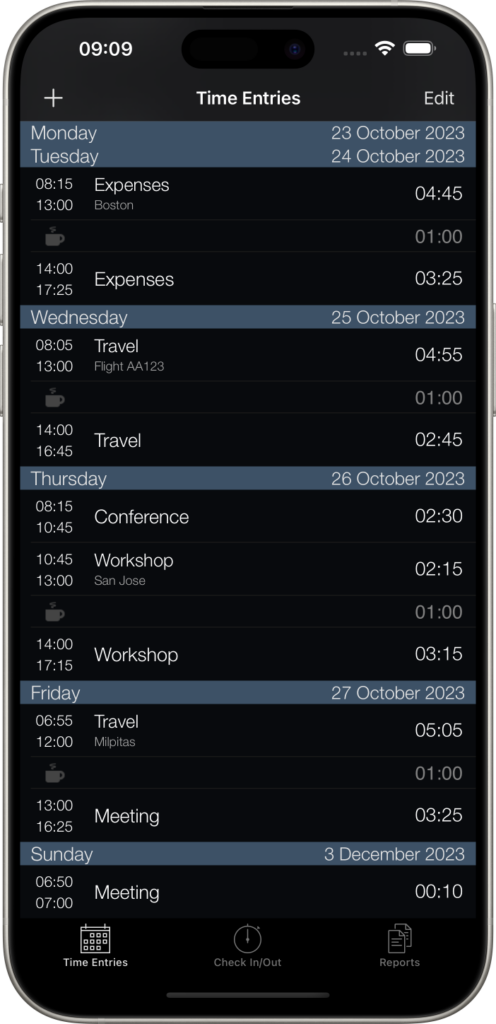
Week Timer is designed to track a single work period a day – check in in the morning, check out in the afternoon, just like you would with a classic punch clock. Your target check out time is indicated in the check out field.
This is the easiest way to track time if you only have a lunch break that you want to deduct. The lunchtime is deducted automatically according to your settings.
On the other hand, you may check in and check out several times a day, which is also supported. Note that the lunch time will only be deducted from a working time period if it is fully included within that working period. If you check out in the middle of a lunch period, Week Timer will assume you have checked out manually for lunch and not deduct any additional time.
Setting Up Week Timer
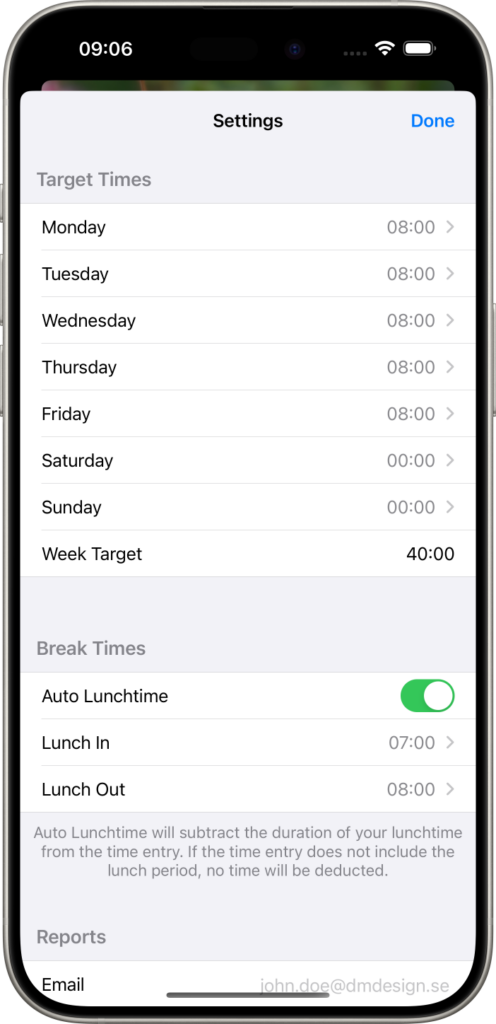
Set your Target Times, expressed as durations, that you are expected to work each day of your work week. Your daily and weekly overtime will be based on these target values. The sum of the target hours is displayed at the end of the section for your convenience.
Enable Auto Lunchtime if you want to deduct your standard lunchtime. The duration of your lunch will be deducted from your worked hours when your work period overlaps the lunch time.
No need to check out and back in again for lunchtime!
Setup your Default Email to send your reports to so you don’t need to enter an email address every time you send your week report. The Apple mail app is required for this feature. Also be sure to set the default mail account in “Settings → Mail → Default Account”
Enable or disable Week Numbers according to your preference. When enabled, week numbers are displayed on the main screen, and take a more central position in the week reports.
US and European week number system supported (ISO 8601). If you would like to know more about week numbers please take a look at: Week Numbers.
Set the First Day of Week if you would like to override the default first day which is based on your current locale.
Specify the Duration/Overtime format that you prefer. There is a choice of “hh:mm”, “hh.dd” or “hh,dd”. This will be used for both the report view in the app aswell as in the emailed reports. Show Overtime will show the details of your overtime for each day of the week. Predictive overtime is always active for the current week, which indicates how many hours you still need to work the remainder of the week to reach your target or more importantly to achieve a good work-life balance. The additional setting for Track Inactive Days is merely there for legacy purposes. If you always register a time entry on each day, even when you skip a day due to e.g. holiday or illness, then this is probably the setting you want. If you want Week Timer to assume empty days are holidays or sick days that don’t impact overtime, then track inactive days shall remain disabled.
If you would like to be reminded to check out just before or after you have completed the target hours for the day, set the Checkout Reminder. If you prefer to be more discrete and not post a notification on the screen stating your overtime, you can replace it with your own custom message. Note that this custom message is identical each time it is repeated, whereas the default message includes overtime and/or checkout time.
Export Time Reports
Select one or more weeks or months by simply tapping on them to export a week or a month report. Tap on the action button and select Email in the menu.
The reports will be included both as text in the email body and as a CSV attachment.
When at your desktop at work, either copy and paste the data from your email to your time sheet or week report, or open the CSV attachment in a spreadsheet program e.g. Excel if that is a more suitable workflow.
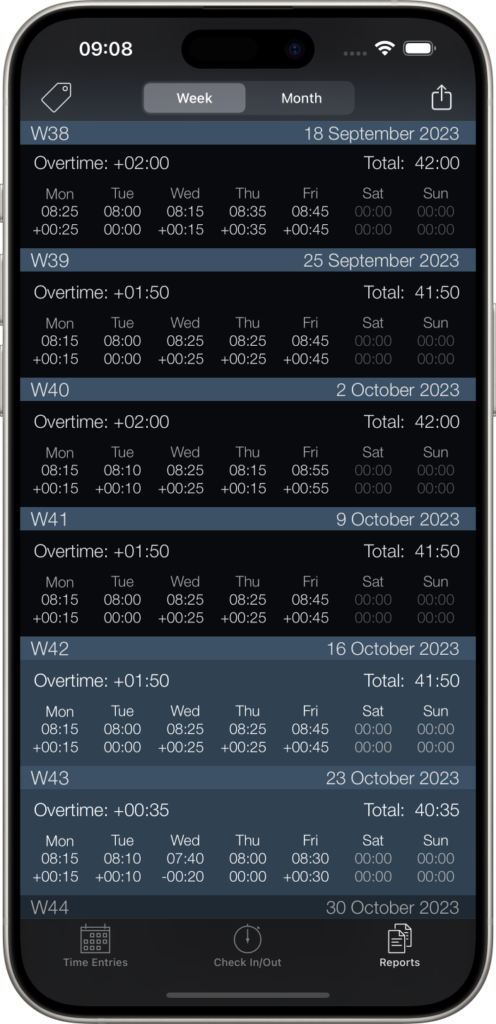
The report contains the following information:
- Totals of selected period
- Week days
- Check In Date
- Check Out Date
- The total duration of all breaks, including lunch time and any other times you were checked out that day
- The duration which is the total working time
- The overtime for each day
- The number of worked hours per week or month
- The total overtime for the whole week or month
- Notes
- Tags – only if tags have been used, otherwise the simple report is sent
Using Tags and Notes
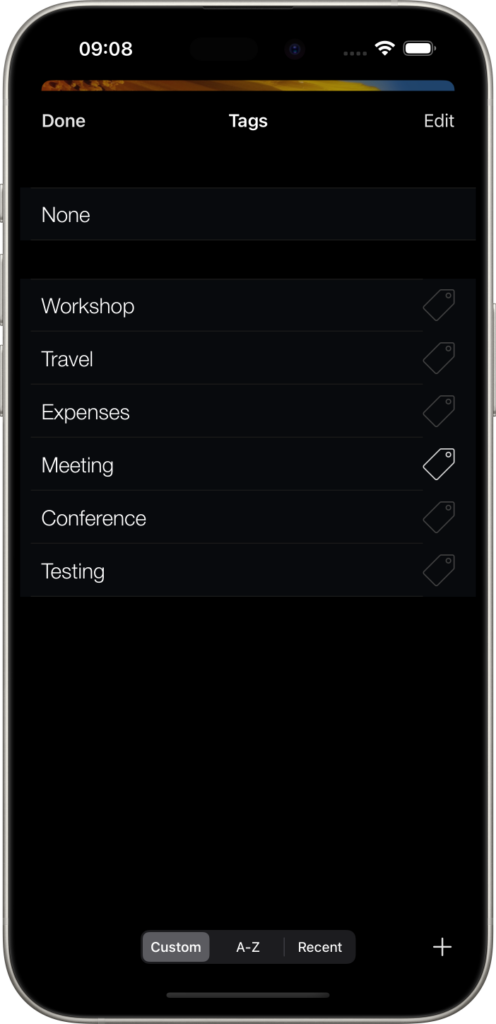
Tags can be used to track tasks in more detail. A time entry can be assigned a tag, which will be used for summarizing all time entries with that tag type. The week or month report will display all the tags used for that period, and sum up the hours for each tag. To show the tags in the Reports view, tap the tag icon in the upper left corner.
For example, if the number of hours that were spent on meetings needs to be reported, then each time entry can be tagged with a “meeting” tag, so the sum of all meetings is reported in the week or month report.
But it gets simpler than that….
Of course, assigning tags afterwards is not efficient when you are working. At any time of the day, a new time entry can be created with a new tag, just by tapping the title bar or long pressing the Check In/Out button. The tag list will be displayed and an appropriate tag can be selected or created, with which a new time entry is created.
Note that when you check in in the morning, the time entry will be assigned the most recently used tag of the last time entry.
While checked in the tag can not only be switched, but also changed for the current time entry, if the wrong tag was selected by mistake. This can be changed either in the Time Entries view, or though a long press on the title bar.
When Tags have been used the Time Report will always include these tags and the sum of the hours for that tag for that week or month.
After some time certain tags may no longer be needed and the tag list can become cluttered. To hide tags that are no longer needed, archive them by dragging the tag to the left or tapping the Edit button and selecting Archive. Tags can also be deleted, but only if they are no longer used by any time entries. Tags in the archive list, located at the end of the tag list, can be restored just by tapping them.
Editing Time Entries and Breaks
In Week Timer both time entries and breaks can be edited. To edit a break or an entry simply select them and change the values.
To delete a time entry, either swipe to the right over the entry, or tap the edit button and select delete.
To add a new time entry either tap the plus button, or long press on a time entry after which you would like to add a new entry. To split a time entry (add a break), long press on a time entry, and select the time entry you would like to split.
To toggle auto-lunch in a new or existing time entry, just tap the break duration below the time entry duration. It will be set to 00:00 and the break will be removed. Tap it again and the break is added. Auto-lunch must be enabled in the settings for this to work.
To change the minute accuracy of the time editor, tap the three dots icon on the bottom right of the screen. 1, 3, 5 or 15 minutes can be selected.
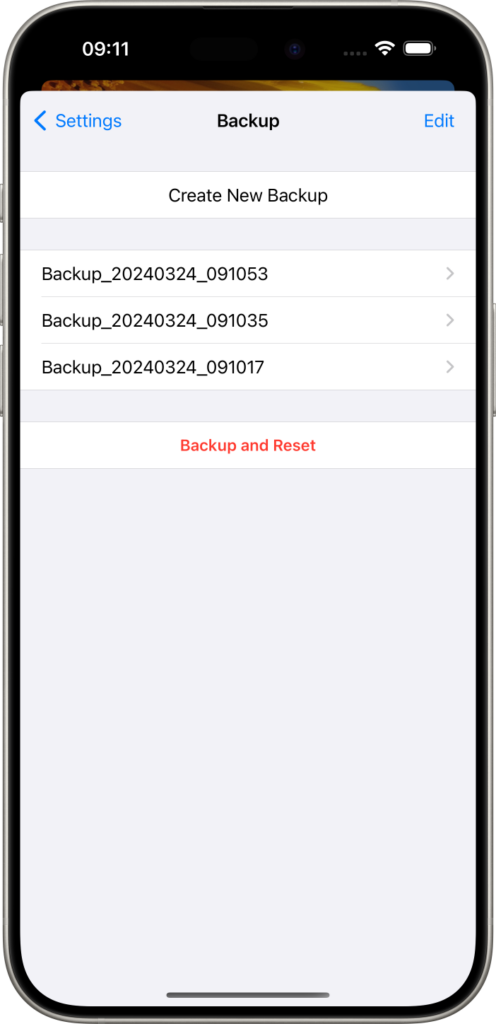
Backup
In the Backup submenu in settings it is possible to create backups of the current time entries. When Create New Backup is selected, the backup will be created and displayed with a timestamped name.
By tapping on the backup, a view appears with the name and the options to email or restore the backup. The backup name can be edited by tapping on it.
Tapping the Email button will will launch the email dialog and attach the backup file. Send this to an appropriate receiver, which could be your own email, or a cloud drive like dropbox.
A less frequently used command is Backup and Reset, which will create a new backup before deleting both time entries and tags. This may be appropriate when changing employer, or when you just want to erase all history for a clean start.
Restore
Restoring can be done when moving to a new device or after reinstalling your device without restoring a full backup from iTunes or iCloud. To restore a backup make sure it is available on your iDevice in for example in your mailbox or a cloud drive. Tap to open the backup file with the extension “.wtb”. This should display a menu which includes Week Timer. Tap Week Timer and the backup will be saved in the backup list in the Week Timer app. Now navigate to the backup menu in settings in Week Timer, where you will see the new backup that was added. Tap the backup and select the menu option restore. This option will make an automatic backup of the current database and then restore the selected backup. Once restored, you are good to go. You may notice that the automatic backup has been added to your backup list. If anything failed with the restored backup the automatic backup can always be used.
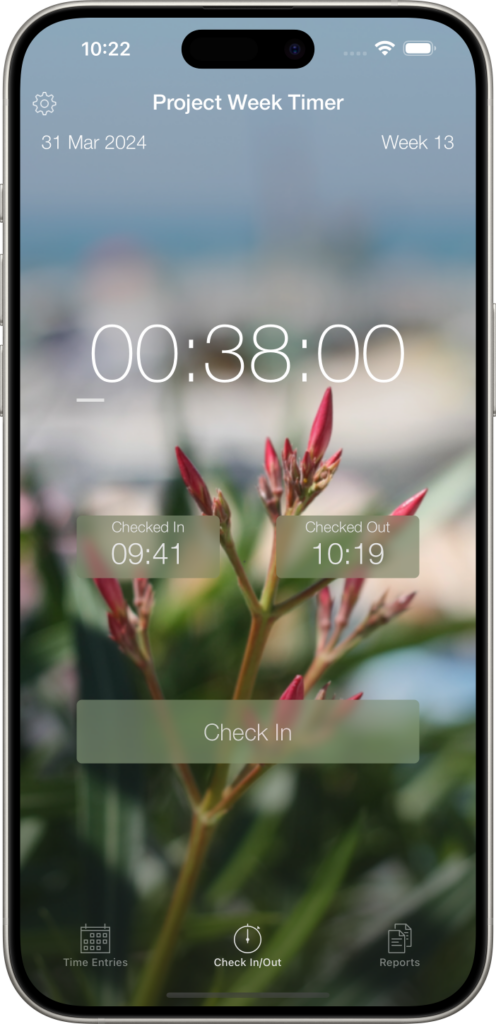
Photo Theme
To customise your main view with a more pleasant background enable Photo Theme. On the photo theme settings page two options are available. Either choose one of the included backgrounds , or select a photo from the photo albums.
Predicted Overtime
Week Timer tracks overtime on a weekly and monthly basis and is reset at the end of the working period. Overtime can be disabled in settings if you are not interested in tracking this because you may not have fixed work hours.
If you do have fixed work hours each week, then you can still benefit from the predicted overtime feature in the Week Reports view. This will show how much extra time you still have left to work on the remaining days of the week. If you have already worked extra hours at the beginning of the week, a negative “overtime” will be displayed on the remaining days.
While still checked in, the predicted overtime will also include the current day, until you have reached this expected overtime. After that the predicted overtime for the remaining days will be adjusted, so you can see your required overtime shrink for the remainder of the week or month.